Tuesday

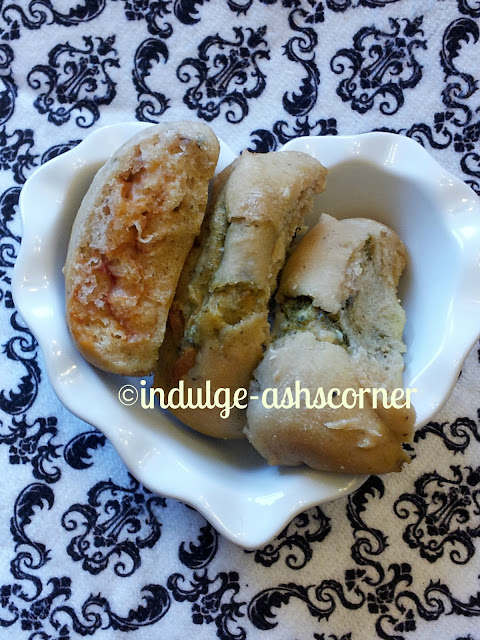
Stuffed Pullapart Bread Roll


Pullapart rolls
Hello Dearies!!!! Things are warming up in Ashland and I am sure they are for you too. Its something about the warm weather that makes you pack your lunch and visit few places, drive some distance yo meet up with friends or simply bake some bread. Maybe the last part holds true for Ms. Ash. 

Whatever be the reason, try making this bread. I saw many posts some time back when members of We knead to bake group  posted something about pull apart loaf. I cannot join any such events as  I am not sure when and how I can do in the deadline. Also I am bad at following recipes. Somewhere I act smart and goof up.

They are surely a bunch of great bloggers though, who whip up amazing bakes and have amazing pictures. Me..........lets just leave it at that.

This is just an excuse I know, but I am not great with deadlines. I am a free will person who cannot be bound by deadlines, that's my alibi, lame I know, but something to cover my laziness and lack of planning. Now on to my version of pull apart rolls.

For the dough,

Prep Time; 10 mins to mix the dough
2-3 hours for the dough to rise
Makes around 14 small rolls of about 2 inches long and 1 inch deep.


You will need;
2 cups whole wheat flour
1 cup All Purpose flour
1 Tbsp dry active Yeast 
1 Tbsp Sugar and 1/2 cup warm water to bloom the yeast
1 Tsp Dried Rosemary
1/2 tsp Dried Basil
1 Tsp Garlic powder
2-3 Tbsp Olive Oil and 
Salt for taste
water as needed to make the dough 

For stuffing;
 2 Tbsp Green chutney/Pesto
2 Tbsp Ketchup
Cheese to spread- as per your choice. I used about 2 tbsp each roll

In a bowl, take the dry active yeast, sugar and warm water and mix well. Keep it aside to bloom for 10 minutes. The mixture will be frothy, if the yeast is active. If the yeast is old discard the mixture and get fresh yeast. I always prefer to check the yeast then move on to the dough.

In a mixing bowl, take the flour, add the seasonings, garlic powder, rosemary, basil,  and little oil to start the mixing, as you move along making the dough, add the oil and knead into a soft dough. Cover with the plastic wrap and let it sit in  a warm place.

I preheat the oven to 200 Degree F and then shut it off. Then place the bowl with the dough to rest and rise for a good 2-3 hours. I have never experienced problems with dough rising not enough.

When the dough doubles in size, it is ready to be baked into some yummy rolls. Punch out the air from the dough and divide the dough into 2 equal halves.

Take one ball and roll a circle of about 8 inches in diameter and spread  the chutney on it, then spread the cheese and roll it into a log, cut equal pieces of it and arrange in a  bread loaf pan and keep aside.

Similarly, do another with ketchup and cheese stuffing and let it rise again for another 30-45 minutes.

Bake in a preheated oven at 375 degree F for about 15-17 minutes. Enjoy warm with some Broccoli soup


PS. Sorry for the picture but I could save only these few from my hungry tummy.

Photobucket

Thursday

Mung Dal Dhokla- Tarla Dalal in my Kitchen.

Lentil Cake, Indian Lentil Cake


Hello Sweeties!!! What has Facebook surfing taught you? For me its the inspiration and motivation, I get from people posting about food. 

I learnt quiet a few things browsing through my Blogger friends FB pages. One such day I saw Manasi aka Cook @ Heart posting these dhoklas. They looked yummy to my eye and a quick chat exchange led me to the source.

Since I followed the recipe to the T I will not post the entire recipe again. But do make it. Some differences I found in my dhoklas as compared to the reviews were;
1. The dhoklas were heavy, not as light as the chana dal one's we normally make;
2. They did not rise much and the smell of mug dal was still present even after cooking through;

Expert dhokla makers, why do you think I would face this issue, is it the dal or the way I made it?? 

 I am sending this to Paris " ONLY event" hosted by Nalini's Kitchen


Photobucket

Friday

Khekda Bhaji-Onion Fritters

Hello Dearies!!!! What does rain, wind and storms bring to your mind? Do they want you to hide curl under the sheets and wait till the thundering pass, or do they  brighten your thoughts and you sort of look forward for happy family night outs in candle light and sipping hot chai with some fritters? 

People in Ashland are the second type, who make sure to relax after all heads are counted, i.e., everyone is settled at home, the party then starts. Be it snow storm, rain storm, the menu does not change. We make these onion fritters or khekda bhaji( Crab Shaped Fritters), Varan and bhat for dinner. If we are lucky to have power we enjoy a movie, if not we enjoy making shadow shapes with our fingers in candle light; Small things bring great joy.

You will need;
3-4 Onions cut in thin strips
Besan or chick peas flour to coat the onion, approx 2 cup 
1 tbspn fine sooji/rava/Cream of wheat
1Tbspn Red Cayenne pepper powder
1 tspn Haldi/Turmeric
1 Tbspn Coriander powder
1 tbspn Cumin powder
1 tbspn Cilantro chopped    
Salt to taste 
2 cloves Garlic- Optional 
Chat Masala to sprinkle-Optional
Little water to mix the flour
approx 2 cups oil for frying

In a bowl, take the onion and separate the strips as much as possible, salt it well, and keep aside for 10-12 mins. The onions will sweat, add the powders, garlic, and coat the onion well, keep aside for another 10 minutes. After the onions sweats and gives out some liquid, mix in the rava and the besan flour, stir well and let it sit for 5 minutes. Add the cilantro and water if needed. The mixture should be lumpy and not watery. Heat the oil till it smokes, then reduce the heat to medium. Use  a tablespoon to  drop the onion mixture in the hot oil, fry till they get cooked and  a nice brown color. Drain on the paper towel and sprinkle chat masala on them while hot. The fritters can be enjoyed with tomato ketchup or green chutney  or tamarind date chutney.

Whichever way you make and enjoy, stay connected and drop me a line, we are now also on G+.

Photobucket

Monday

Pita-Stove top Method


Whole Wheat Homemade Pita


Hello Dearies!!!! We are having some nice sun here in NJ and it is getting warmer for us. The cold and the long winter seems to be ending and  traces of windy days are also reducing.

As we cannot take leave from work/school and  simply leave on  a holiday, we try making the day in our favorite part of the world by eating food from that part. I posted Hummus, Baba Ganoush and today I bring Pita, to complete the mezze.

Pita is roasted in a clay oven and it has no marks of the roasting. But since my oven was busy and  I was super excited to wait; I made it on a Gas Stove. The idea is same like a phulka/puffed Indian Bread, but the thickness of the bread and the addon of the yeast is what is different.
Source
You will need;
**Makes about 7-8 Pitas
2 Cups Whole wheat Flour
1 Cup All Purpose flour
2 Tbspn yeast
1/2 cup warm water
1 tspn Sugar
1 tsp Salt
Water to knead the soft dough
1-2 tbspn Olive Oil, to coat the dough 
 
In a small bowl, take the warm water, add the salt and sugar and then the yeast and let it rest for 10-12 mins. If the yeast froths, its good to work with. 

Take the flours, add the frothed yeast and enough water to knead  a soft dough. Liberally coat it with oil, cover and rest for an hr or till the dough doubles.

After the dough has doubled, divide it into 7-8 tennis ball size rolls. Take one and keep the rest covered. Roll out a thick roti/pita of about 1 cm height, and 6 inches wide and dust with some All purpose flour and keep aside. Ccomplete rolling rest of the dough balls similarly. 

Now you can roast these roti/s pitas in a pre- heated pan at 300 degree F or alternatively roast them in a pan on a direct gas stove. Start with one side, let the bubble come up, flip and roast till similar bubbles form on that side and then on direct flame puff them on both sides.

The Pitas will be ready. You can cut in half and make wedges and serve it like a pita pocket with fillings or as a  chip or as a whole with the  other dips. whichever way you make, enjoy these little food trips around the world in comforts of your own homes sans the hassle of packing and unpacking.
hummus, pita and baba ganoush


Photobucket

Thursday

Katachi Amti- Puran Poli Chi Sobatin


Hello Dearies!! Today we Celebrate The Marathi new Year i.e. Gudi Padwa. Although Shrikhand is the  sweet many homes prepare today, lack of time and energy at times compels us to either outsource the sweet or make something else. Planning, prepping, sourcing the materials and then actually preparing takes some time.

There is no hard and fast rule that certain sweets only should be made and others cannot, however general practice prevails and people do tend to follow the age old customs.  

However, today I bring to you the most famous combo, Puran Poli and Katachi Amti. I have posted Puran Poli recipe not once but twice before. So now I will link you to Puran Poli and post the amti recipe today. Gear up as the process may look long if making the amti alone, but if making with puran poli, it's a breeze.


You will need;
2-3 cups Kat-water from the dal

** Drain the water from the cooked chana dal ( we call this water as "Kat" in Marathi; see puran recipe below)
1 tbspn Jaggery
1 tbspn Tamarind Juice/paste

**If using Tamicon Concentrate 1 Tspn is enough 
1 Tspn Red chili powder
** Adjust to your spice level. This is Medium hot 
Salt to taste

1 Tennis Ball Size Puran
** See Recipe after Masala.

Tempering
1 Tbspn oil
1 Tspn Mustard Seeds 
1 Tspn Cumin/Jeera
1/2 tspn hing/Aesafodita 
 5-6 Curry leaves
  
Masala;
1 Tbspn Dry Coconut powder
1 tspn Cumin seeds
1 inch Cinnamon stick
5-6 Cloves

5-6 Peppercorn

** For the Puran;
This is a Measure for making approx 20 Puran Poli, for amti you need only one tennis size ball of Puran. 
3 cups Chana Dal
2 cups Gul or Jaggery
1 cup sugar
Or Use 3.5 cups Jaggery alone

In a pressure cooker, add the washed dal and 7-8 cups water. Pressure cook for abt 7 whistles. let cool. once cool, strain the dal so that all water is separated and the dal is dry. This Water is Called KAT, and we make the katachi amti from this. Once again take the dal in a cooker and add gul /jaggery and sugar. On low heat, cook this till the mixture starts leaving sides and starts sticking to the spoon. Keep stirring this from the time you put it on heat. You will reach a point when your arms will talk to you. The mixture will look dry and The spoon if made to stand will stand on it's own....your puran is done...


Now Back to Amti;
 Take a deep pot, Add the Kat/Drained water from the cooked dal,  to this add one big tennis ball size of puran, little jaggery, little tamarind paste, red chili powder, salt and keep aside. 

In a pan, roast  the Masala Ingredients-Cumin seeds and dry coconut with cloves, peppercorns, Cinnamon stick. after the mix turns brown, grind it into powder. add this to the dal mix set aside.


In a separate wok, take the oil, when its hot, add the tempering ingredients one after the other in the same order, when the tempering is ready, add this to the dal mix, and heat till it comes to a rolling boil. Katachi Amti is done. Add water to either thin it out or leave it thick. We like it thick.

This amti/dal goes with Puran Poli as well as Plain Rice with a dollop of ghee.


Photobucket

Monday

Baba Ganoush- Mediterranean Dip


Baba Ganoush

Hello Dearies!! Today I bring to you another dip from the Middle-east. Baba Ganoush or Eggpant dip is a very popular dip and it is very easy to make. It resembles to a very homely mush that we make at home i.e baingan ka bharta, yet it is very different in the cooking technique. 

When making this I realized that this dish will be ideal when you are traveling as there is not much that will spoil the dip in heat and that it does well without refrigeration. We will be making this dip many times come BBQ season, hope that you will too make it just as often.
Source
You will need;
1 Eggpant baked in oven at 400degree F-
1 Bulb garlic Baked along with the eggplant.
**I baked the eggplant and the garlic bulb in the oven at 400Degree F for 40-45 minutes, then removed the flesh from the eggplant and the garlic bulb and mixed that well.

1 Tbspn Tahini Sauce
**Soak 1/2 cup Sesame seeds with water, grind them in a mixer with some salt and olive oil.

1 tsbpn Cilantro leaves
1 tspn cumin 
1 green chilli
Salt to taste
Juice of 1 Lemon
1 tspn cayenne pepper-Optional
Olive Oil to coat the dip

 In a food processor, take the above except the olive oil and pulse till everything blends into a smooth paste. My Baba Ganoush is slightly green in color as I used cilantro and baked garlic. Lastly remove it in a bowl and coat with olive oil. The dip is ready to be served and enjoyed with some pita goodness.


Photobucket

Thursday

Hummus- Mediterranean Calling- dip it or lick it


Chickpeas Hummus

Hello Sweeties!!! How is it at your end of the world. Spring has arrived long back on our calenders yet there is nothing in air that feels like spring here in NJ. Its just so cold and windy. Its days or weeks like this that make me crave for some heavy protein dish. Some hearty and earthy dish. What better than chick peas, healthy legume and good source of protein for veggies like us.

I am experimenting with some new and no cook dishes lately. Work has been killing me and  I look forward to no cook, slog over stove dishes that can be done and kid approved instantly.
 
Mediterranean food has been attracting me since a long time. I have tried only Falafel, which I absolutely love. The Tahini + Red Sauce and lettuce +salad with bread and pattie has been the Mediterranean fix for  a classic subway sandwich, only better in my case.

I have been successful in making Pita from whole wheat on a gas stove, which many argue is not technically pita as it does intend to get stove marks, but whatever works for you, I say go for it. My oven was busy with other things and I had to get the lunch on time, I roasted the Pita on the stove.

Today I bring to you the classic dip Hummus. This is so easy that even my nine year old son could do it. There are not many things that you would need and still get such a tasty and easy dip in less than 5 minutes.

You will need;
1 cup chick peas, plus some for garnish
**I used canned
**Alternatively, soak 1 cup chickpeas overnight  and boil al-dente with salt
1-2 cloves garlic
2 tbspn sesame seeds soaked in water
1 tspn cumin seeds roasted
1/2 cup EVOO/Olive Oil + 1 tbspn for  coating
2 tspn lemon Juice 
salt to taste
red Cayenne pepper to sprinkle 

In a food processor, take all the above except cayenne pepper powder and  1 tbspn olive oil, and pulse till you get a smooth paste. You can go for ultra smooth or chunky, its up to you. Remove this in a bowl and  add the reserved 1 tbspn Olive oil and sprinkle the Cayenne powder. Garnish with few chickpeas.

The dip is ready for some pita/chips or as is. Donut licks the bowl as is. Its that good.

I am sending this to Paris " ONLY event" hosted by Nalini's Kitchen


Photobucket

Monday

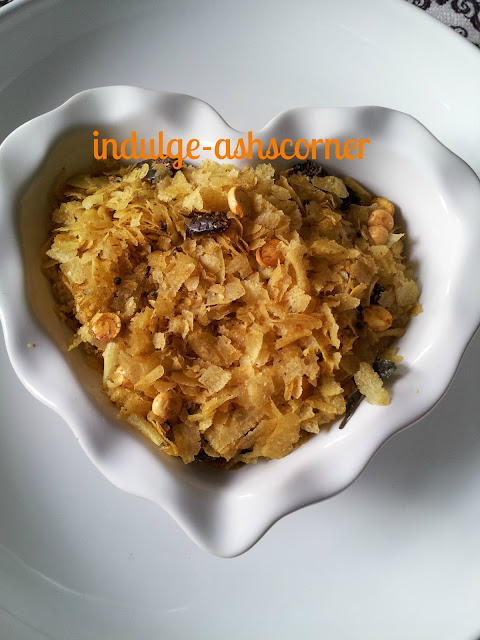
Pohyacha Chivda- Desi Answer to Trail mix.

pohachivda/rice flakes trail mix
Hello Dearies!!! Its blast from the past today!! Chivda is a staple at my home most times. This is easy to make and so popular with most of my guests that if you have chivda and someone calls for in for tea, then no other snack is needed in such unprepared times.  I am keeping things short today as I am in a rush to get my day time job duties finished. Kindly excuse me for my no-show here, but I promise you that I will be back with some very new recipes and  surprises for you in the next couple of months.

You will need;
 
3 lbs Thin Rice Flakes
1 cup Peanuts Roasted
1/2 cup Cashews
1cup Raisins or Dried Cranberries
1 Cup Daliya/Toasted gram lentils
1/2 Almonds roasted-Optional
Green Chilies-- 5-6
Curry leaves about a handful
Salt Sugar, Corriander and Jeera powder and 1 Tbspn Amchur or dry mango powder- approx 1-2 tspn each.

2 Tbspn Bedekar Chivda Masala- Optional But highly recommended.
 

Tempering;
1/2 to 3/4 cup oil -
**Use your judgement. Use more if the Poha absorbs all oil in the tempering.( At times  the poha absorbs the oil, at such times you might need to make the tempering again.)
1 tbspn Mustard seeds, 
1 tbspn Cumin Seeds/Jeera, 
1 tspn Aesafodita/Hing 
1 tspn Haldi/Turmeric 

In  a wok, dry roast the rice flakes till they get roasted .. meaning if you crush a few flakes, they should form powder... this is a good sign that they are roasted well..


Now remove these roasted flakes in a tray.. let it cool...
in the same wok, heat the oil, add the mustard seeds, jeera, chopped green chillies, curry leaves, peanuts, daliya, almonds and cashews.. fry for 5 mins then add raisins/cranberries, salt and sugar... again fry for one minute.. 


lastly add the Roasted thin flakes and stir well.... add the coriander and Cumin powder, Dry mango powder, chivda masala and stir well....Njoiii this Chivda

To make chivda bhel, add in chopped onions and tomatoes, dash of lemon juice and shev on top.

I am sending this to JCO's Gain Popularity event. Its been awhile since I participated in any blog events. Hopefully, I might gain some popularity by sending in my entry.


Photobucket